LCD MAME Cabinet - Formica - Cutting, Gluing, Trimming
Cutting Formica
Before beginning the Formica process, I made sure all the screw heads on the outside of the cabinet were completely countersunk a little below the surface of the wood. I then used wood filler and a putty knife to fill all the screw holes. After allowing for the proper drying period, I sanded the wood fill smooth so the cabinet sides had no imperfections. The cabinet was now ready for Formica.
 |
| Cutting Formica for MAME Cabinet Sides |
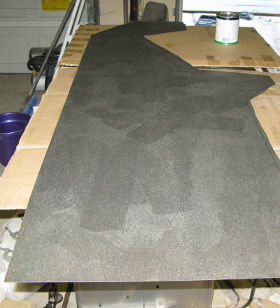
Formica is a plastic laminate that comes in large sheets (think plywood size). It's fairly thin...perhaps roughly the thickness of a phone book cover, depending on the thickness you choose. It may be purchased in a variety of colors, textures and thicknesses. It can be purchased locally, but you'll probably find a better selection online. It's easily shipped, rolled up in a box.
For my MAME cabinet, I chose a black Formica with a bit of texture in it. I chose the texture to help match the texture on the X-Arcade control panel and also to reduce the visibility of fingerprints. I chose a decent thickness for strength and to help hide any imperfections in the wood pieces that were to be covered. Remember to take into account the thickness of the Formica when you are building your cabinet so that you don't have problems fitting the pieces together after the Formica has been adhered to the boards. For example, I had the glass set back into the cabinet about an inch. I covered the inside of the cabinet with Formica in these areas. If the thickness of the Formica had not been considered on this inside area, it's possible the glass may not have fit (side to side).
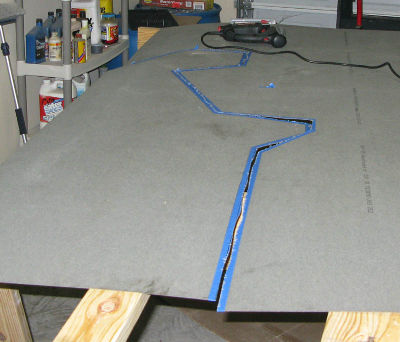
I used a jig saw to cut out the Formica pieces. Since a jig saw cuts on the upstroke, usually the top surface of whatever you are are cutting will splinter. When cutting Formica, this could easily lead to chipping. In order to avoid this, always put the
 |
| Applying Contact Cement to Back of Formica |
On some areas of the cabinet (specifically, the front piece under the controller panel), I needed two Formica pieces to be butted up against each other at an angle. This means that where the two Formica pieces meet needed to be an extremely clean and accurate cut. For situations like this, I used my table saw to cut the Formica. Home Depot (and probably Lowes) has inexpensive (~$7) table saw blades made for cutting plastics (many teeth make a fine, clean cut).
Applying Cement to Formica
Next, contact cement is applied, with an adhesive roller, to the back side of the Formica and also to the cabinet side. I had the cabinet laying on its side while applying the contact cement.
Using Dowels to Position and Adhere Formica
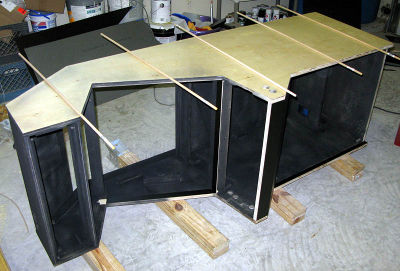
After the appropriate contact cement setup period, it's time to install the laminate. The first step is to lay out dowels across the cabinet. Place the dowels about 12" - 18" apart. The idea is to space them at a distance apart so that the Formica will be suspended above the cabinet and not touch it.
 |
| Laying out Dowels to Suspend Formica |
Once the dowels were positioned, I carefully placed the Formica on the cabinet side. It was positioned so the Formica overhangs equally on all edges. Once in place, I start at the top or the bottom of the cabinet and remove the first dowel. I carefully push the Formica into contact with the cabinet side, making sure it's properly positioned. Now that it's adhered, I slowly remove dowels one at a time and use a J-roller (a hard rubber roller head) to roll out any bubbles as I worked my way to the other end of the cabinet. Generally, you want to roll from the center outward to make sure any air bubbles are pushed out toward the edges of the cabinet.
 |
| Formica Suspended Above Cabinet |
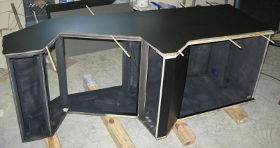
When finished, the Formica is firmly adhered to the cabinet side. No bubbles are visible and it looks great.
After the contact cement is set, I turned the cabinet over and repeated the whole process for the other side.
Trimming Formica with Flush Trim Bit
The final step is to trim the overhanging Formica from the edges of the cabinet. This step is very similar to cutting the slot for the T-molding. Instead of using a slot cutter bit in the router, a flush trim bit is used. The flush trim bit has a steel wheel on the bottom of it. The router height is adjusted so that this wheel rides/rolls on the edge of the plywood
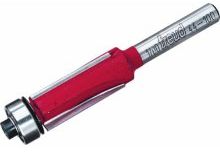 |
| Router Flush Trim Bit |
After completing the cabinet sides, the same steps were followed for the other parts of the cabinet that needed Formica (the front door, inside of the cabinet edges where the glass sits, etc.).