Building a Home Theater - Screen, Speaker Columns, Drywall
Designing the Screen Wall
The next task was to build the "screen wall". After determining the width of the screen, I measured out an equal distance from each screen edge and began to construct speaker columns. These columns were round (semi-circular) and built from floor to ceiling. I built a shelf half-way up each column for the front speakers. Next I built a small stage below where the screen would be located.
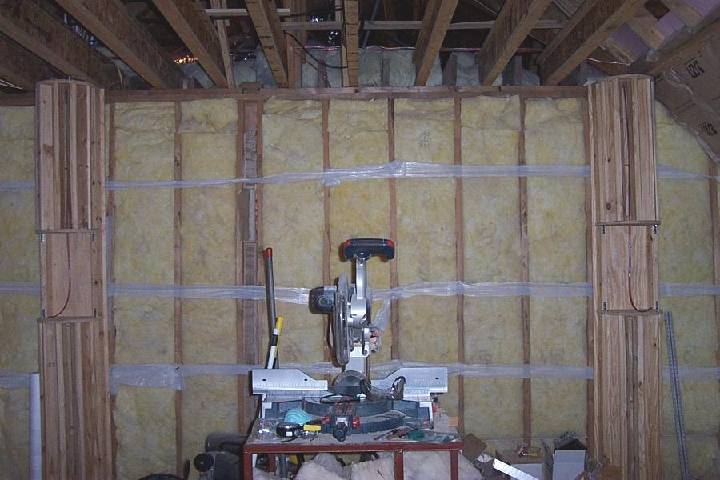 |
| Framed Speaker Columns |
Wrapping the Speaker Columns
I "wrapped" the columns with a special bendable plywood. It's called Bending Board. It looks like normal 3/8" plywood, with one difference. Normal plywood has every other laminate layer with the grain 90 degrees from the previous. This makes plywood very stiff and strong. Bending Board has all the laminate layers with the grain laying the same way. This makes the board bend easily in one direction, but stiff in the other direction. Even though it's flexible, after cutting the boards to size, I still had to put them in the shower and "steam" them with hot water. This gave just enough extra flexibility to wrap them around the columns and screw them in before they stiffened up. I think the finished product turned out pretty decent.
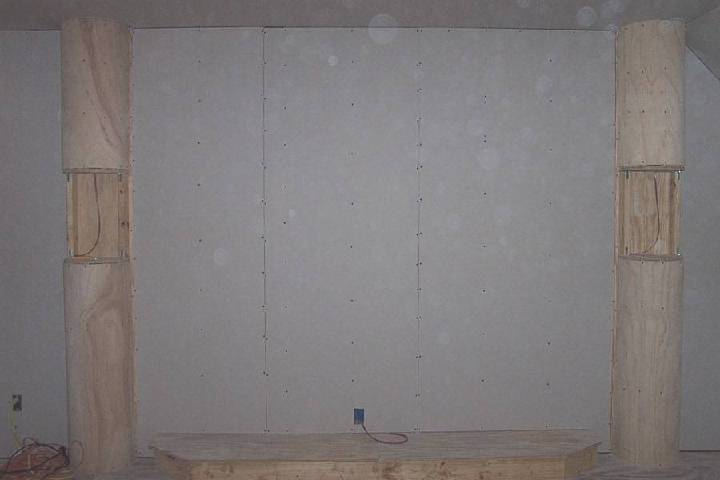 |
| Completed Speaker Columns |
Placement of the Equipment Rack
I puzzled over where I should place my equipment rack. There wasn't a whole lot of extra space in the room and I worried about light from the equipment disturbing people. Fan noise was also a concern. My dad, once again, came up with the winning idea. There is a hallway that leads into the home theater room and just before entering the seating area (around the corner from the screen wall), the hallway wall has a walk-in closet on the other side of it. This closet is in our weight room and wasn't really being used for much of anything. It was the perfect place for an equipment rack. I cut open the wall and re-framed it so I could connect 19" equipment rack rails in the opening.
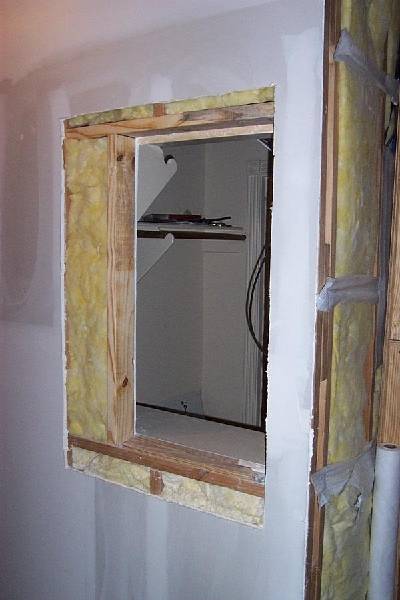 |
| Equipment Rack Opening |
Wiring the Room
With the framing completed, electrical was the next step. Wire and boxes were run and installed for lighting and outlets, as well as low voltage wiring for all the speakers around the room. Boxes and cabling for the projector were put in place too.
Insulationg and Hanging Drywall
The time had finally arrived to button up the room by adding insulation and the drywall.
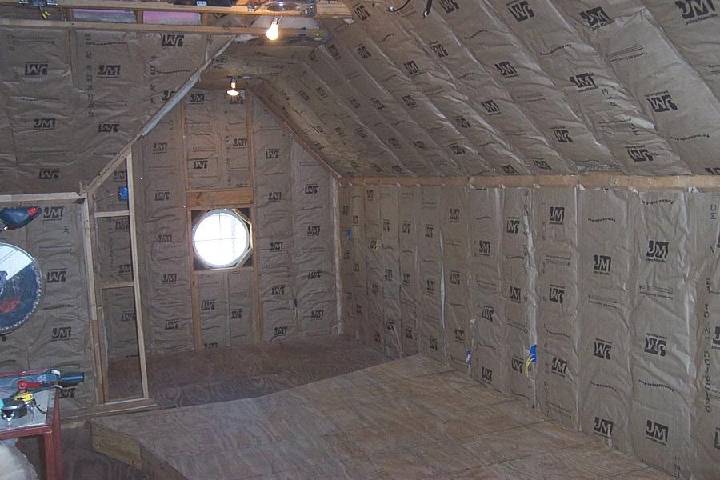 |
| Snack Area Insulated |
I used the largest drywall boards I could maneuver up the stairs and around corners. Larger drywall boards mean fewer seams. Taping and mudding takes time and skill, so reducing that extra work (especially for an amateur) can save a lot of time and frustration.
I wanted to use 12' X 8' sheets, but 10' was the longest I could manage through all of the turns. Trying to hold a 10' long sheet of drywall up while screwing it into the studs can be a challenge, to say the least. A drywall jack can be a life (and back) saver. Simply crank the jack up and it holds the drywall in place while you screw it in. Drywall jacks can be purchased for a reasonable amount, but if you only need one for a day or two, renting from one of the big box hardware stores is very economical.
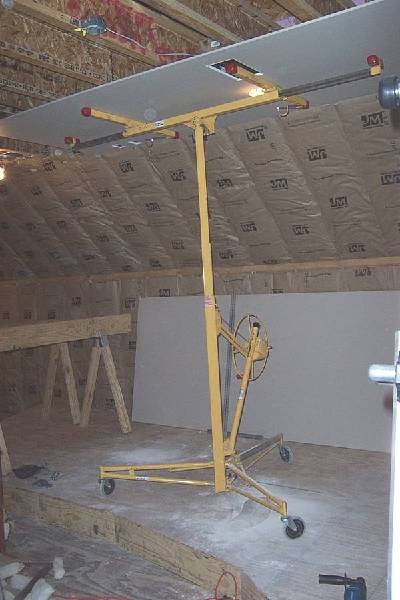 |
| A Drywall Jack is Worth Every Penny |
Taping and Mudding
Taping and mudding is very doable by an amateur. However, it does take some practice. There are lots of online tutorial and videos to help. The overall idea is to use only as much mud as needed and to make the application of the mud as smooth as possible. Excess mud will have to be sanded and sanding is time consuming and can make a huge mess.